Don't get me wrong, we like a lot of vegetables, and prepared in many different ways, but roasting really is our favorite. Is it wrong to openly admit that we have a favorite? Will, say, steamed broccoli suddenly become jealous? I guess I don't care, I would shout it from the rooftop, that is, if I could get up there.
If you like veggies to begin with, this will send you over the top. If you don't, all I ask is that you give roasting them a try. All vegetables take on a completely different taste, when cooked that way. It brings out the natural sugars, making them sweeter, and a lot of them take on a slightly nutty flavor. You might be pleasantly surprised by this new taste. For instance, my grandma was one of the best cooks known to man, but she was very unimaginative when it came to cooking asparagus and brussel sprouts. For asparagus, she would steam it until almost tender, then make a cream sauce with it. The asparagus came out mushy, and she would put it over toast. I hated the smell, taste and texture. With brussel sprouts, when she made them she just boiled them until they were soft. Then she put butter, salt and pepper on them. Again, mushy and with a flavor I wasn't crazy about. For years I thought I didn't like either of those vegetables, until I learned of the miracle of roasting them. Put a little oil and seasonings on asparagus and throw it oven until they are just barely tender - amazing! Find a nice cast iron pan for the brussel sprouts. Drizzle on some oil and balsamic vinegar. Stir in a little brown sugar and seasonings. Pop them in the oven, stirring every so often until the outsides are nice and crispy brown, and the insides are soft and tender. Gold, baby, they are gold! Those are just a couple of examples, but believe me, roasting really does make every veggie better.
Today for lunch, I focused on two more of my favorites: squash and cauliflower, roasted separately, but with the ingredients being almost identical.
Here is the cast of characters for the Roasted Acorn Squash

1 Acorn squash
3 Tablespoons of olive oil
1 Teaspoon, each, dried onions*, minced garlic and chicken bouillon granules
1 Tablespoon Standard Seasoning Mix
1 Tablespoon butter (optional)
1/4 Cup shredded Parmesan Cheese
*Note - most of the time I use fresh onion, but there are times where I am in a hurry and dried onion will do. This is one of those times, however, feel free to sub fresh for dried if you want.
First, fill a large pot half full of hot water and put whole acorn squash in.

Turn to high heat until it comes to a boil. Lower to medium heat and cover. Cook for 10 minutes. Take the squash out and let it cool just enough to handle it. Then cut in half with a very sharp knife.

Take a tablespoon and scoop out all of the seeds and guts.

Next, very carefully peel the skin off. Make sure you don't take too much flesh when you are doing this.

Cut into bite-size pieces.

Place in a mixing bowl, and add everything except the butter and cheese. Mix until all the pieces are well coated.

Spread onto a cookie sheet lined with foil.
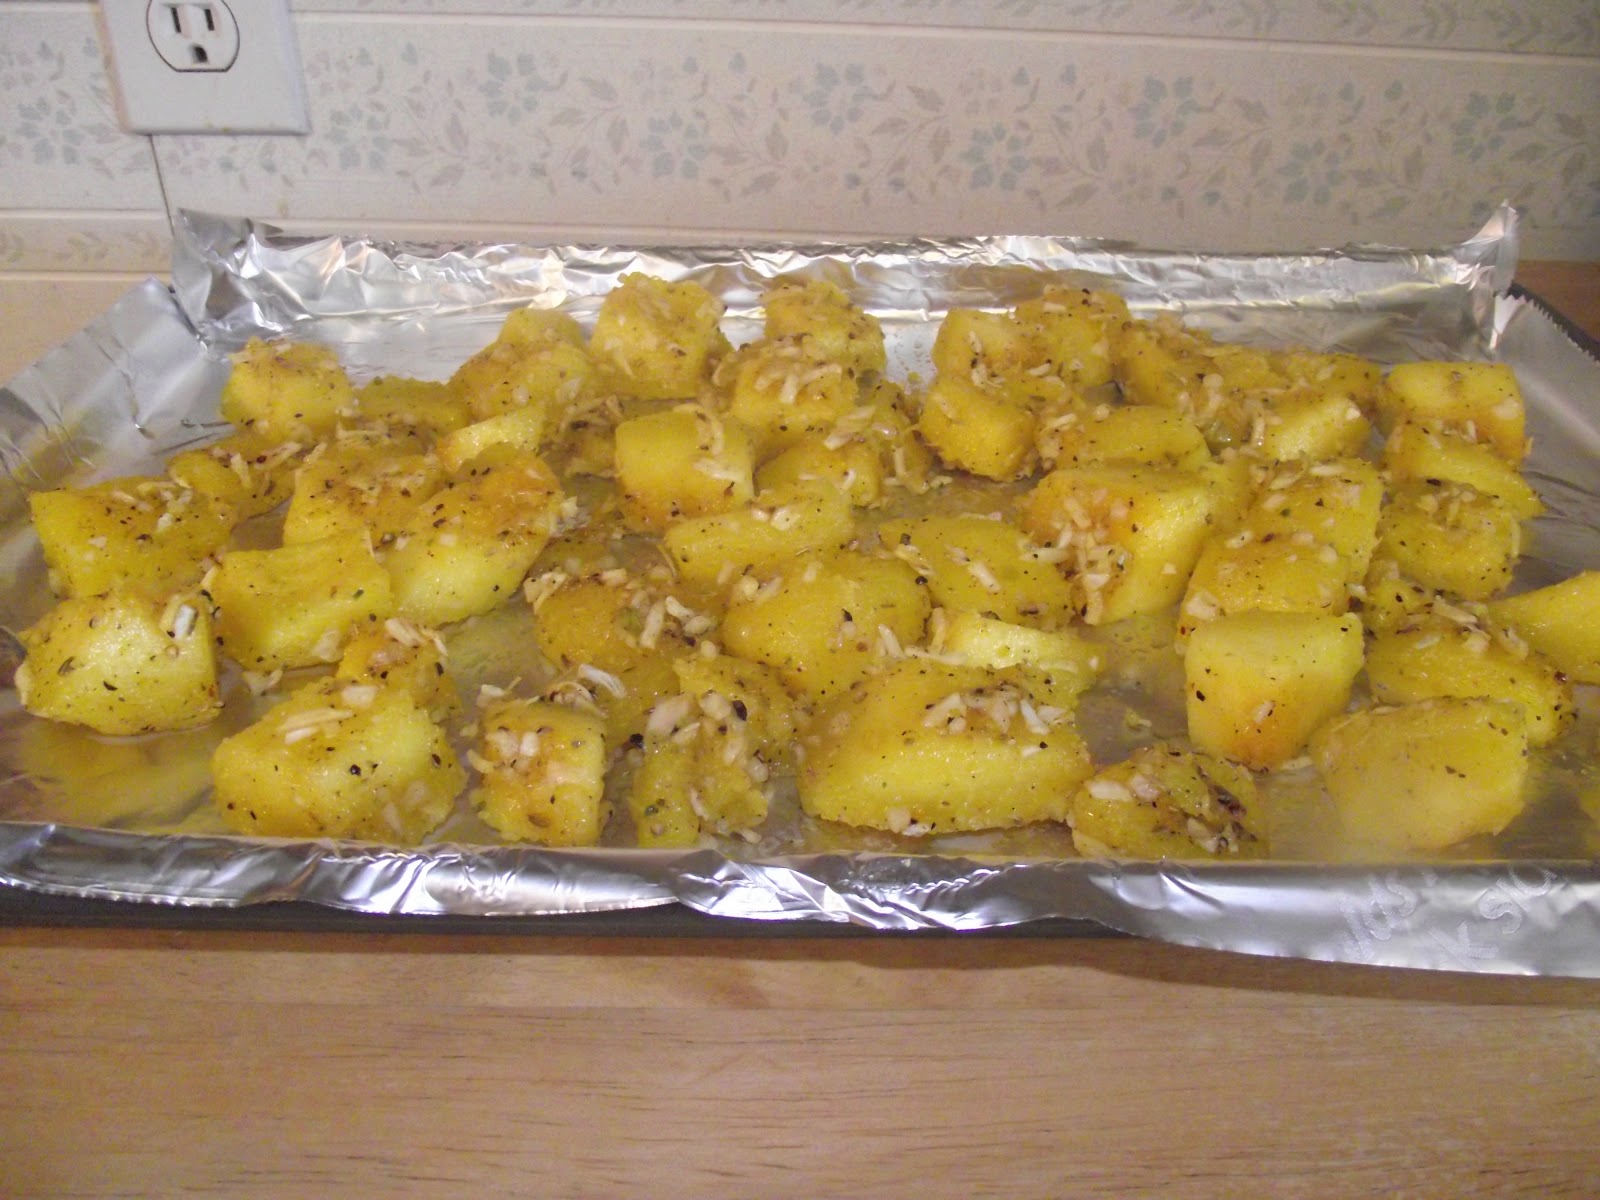
Bake at 325 for 40 minutes, turning once so each side gets evenly browned.

Once they are done, place in serving bowl, add butter & shredded Parmesan cheese. Allow the butter to melt a little bit before stirring to mix. Serve right away.
Now, most people prefer winter squash sweetened up with butter, brown sugar, cinnamon and other spices, and I like that, too, but I prefer this savory recipe.

Here is your cast of characters for Roasted Cauliflower

Remember my previous post about simple things? Yeah, this is another one of those dishes.
2 Bags of frozen cauliflower (Yes, you could use fresh, but, honestly I hate the time it takes to clean a head, and for this recipe, it really doesn't make a difference.)
3 Tablespoons olive oil
2 Tablespoons Standard Seasoning Mix
Thaw the cauliflower out just a little bit, enough so that the oil and seasoning will stick to them. Put in a large mixing bowl, and add oil and seasoning mix. Toss to coat the pieces well. Line a large cookie sheet with foil, and spread the cauliflower out in a single layer. You want a cookie sheet big enough for this because each piece of cauliflower needs its own space to get all wonderfully brown and nutty!

Bake in a 375 oven for an hour or until the pieces get a beautiful bronze color. Stir once in while so they get browned evenly.

They are good like this, but we prefer them even browner, until they are almost caramelized. We just ran out of time. But, when you let them get a deep brown color, well, I can't even begin to tell you how good they are! They make your knees buckle. Seriously, make sure you are sitting down the first time you try a bite. I don't want to be held responsible for any injuries that may or may not occur when you take that first bite and your knees give way.
Enjoy!

No comments:
Post a Comment