Thursday, March 28, 2013

Spinach and Gorgonzola Stuffed Meatloaf

So, what am I doing tonight?  I need only say 3 words:  March Madness, Baby!  I may not have mentioned this before, but I am super competitive and I love sports, both playing and watching.  My favorite, however, is basketball.  This is truly my favorite time of year, as far as sports are concerned.  I can't get enough of those do or die games where teams are just trying to make it into the bracket.  Then, once those 64 are set, whoa, mama, I'm in heaven!  I will gladly stay up late, on the edge of my seat, to watch those nail-biter games.  I just can't get enough!

Here's an example of the type of sickness that I am talking about.  My daughter was born on St. Patrick's Day, right in the middle of the scramble to get into the tournament.  While I was in labor, we had the basketball games on the tv.  My husband left to go get some ice for me, and a nurse came to check in.  When she saw the game on the tv she said, "Oh, honey, you're the one in labor, you don't have to watch this if you don't want to.  What would you like me to turn the channel to?"  I looked at her like she had grown another head and replied, "Don't change the channel!  I'm watching that game!  IT'S MARCH MADNESS!!"  I think I may have frightened her a little by my vehement answer, and I think she might have realized that I would tear her limb from limb if she changed the channel, because she quickly set the remote back down. 

I've told this story to my daughter several times, while explaining that it's only natural that she love basketball, given the time of year she was born and what we were watching on tv.  But, what does this have to do with cooking?  Absolutely nothing, except it's another passion of mine, and I happen to be watching a good game right now as I am typing.

Since this is a cooking blog, I won't bore you anymore with basketball.  We'll move right on to the recipe.  Here's your Cast of Characters.


1 Lb., each, lean ground beef and ground pork
1 Egg
1 Cup fat-free half and half
3/4 Cup bread crumbs
2 Tsps. Lawry's seasoning salt
1/2 Tsp., each, black pepper, Italian seasoning, and Mrs. Dash Onion & Herb blend
1 Tsp., each, McCormick Perfect Pinch Tuscan seasoning and Garlic & Herb seasoning
2 Tsp. minced garlic
1 Cup fresh baby spinach
1 5 Oz. tub Gorgonzola crumbles

Sauce:
1 14.5 Oz. can fire-roasted tomatoes and garlic
1 6 Oz. can tomato paste
2 Tsps. sugar
1 Tsp., each, Lawry's seasoning salt, Tuscan seasoning and Garlic & Herb seasoning

Preheat oven to 400 degrees.  Line a large cake pan with heavy-duty foil.

In a large mixing bowl, beat egg and half and half very well.

Add bread crumbs and all seasonings, mixing into a paste.


Next, add beef and pork, mixing thoroughly.


Place half of the meat mixture in the prepared fan, shaping into a large rectangle.  Sprinkle half of the Gorgonzola crumbles down the middle, being careful to leave about an inch along the edge clear.


Make a single layer of spinach leaves over the cheese.  Sprinkle remaining Gorgonzola over the top.


Use remaining half of meat mixture to carefully cover the cheese crumbles and spinach.  Pinch edges together and smooth them out.


In a small bowl, combine sauce ingredients and stir well to combine.


Spoon onto meatloaf, spreading evenly.


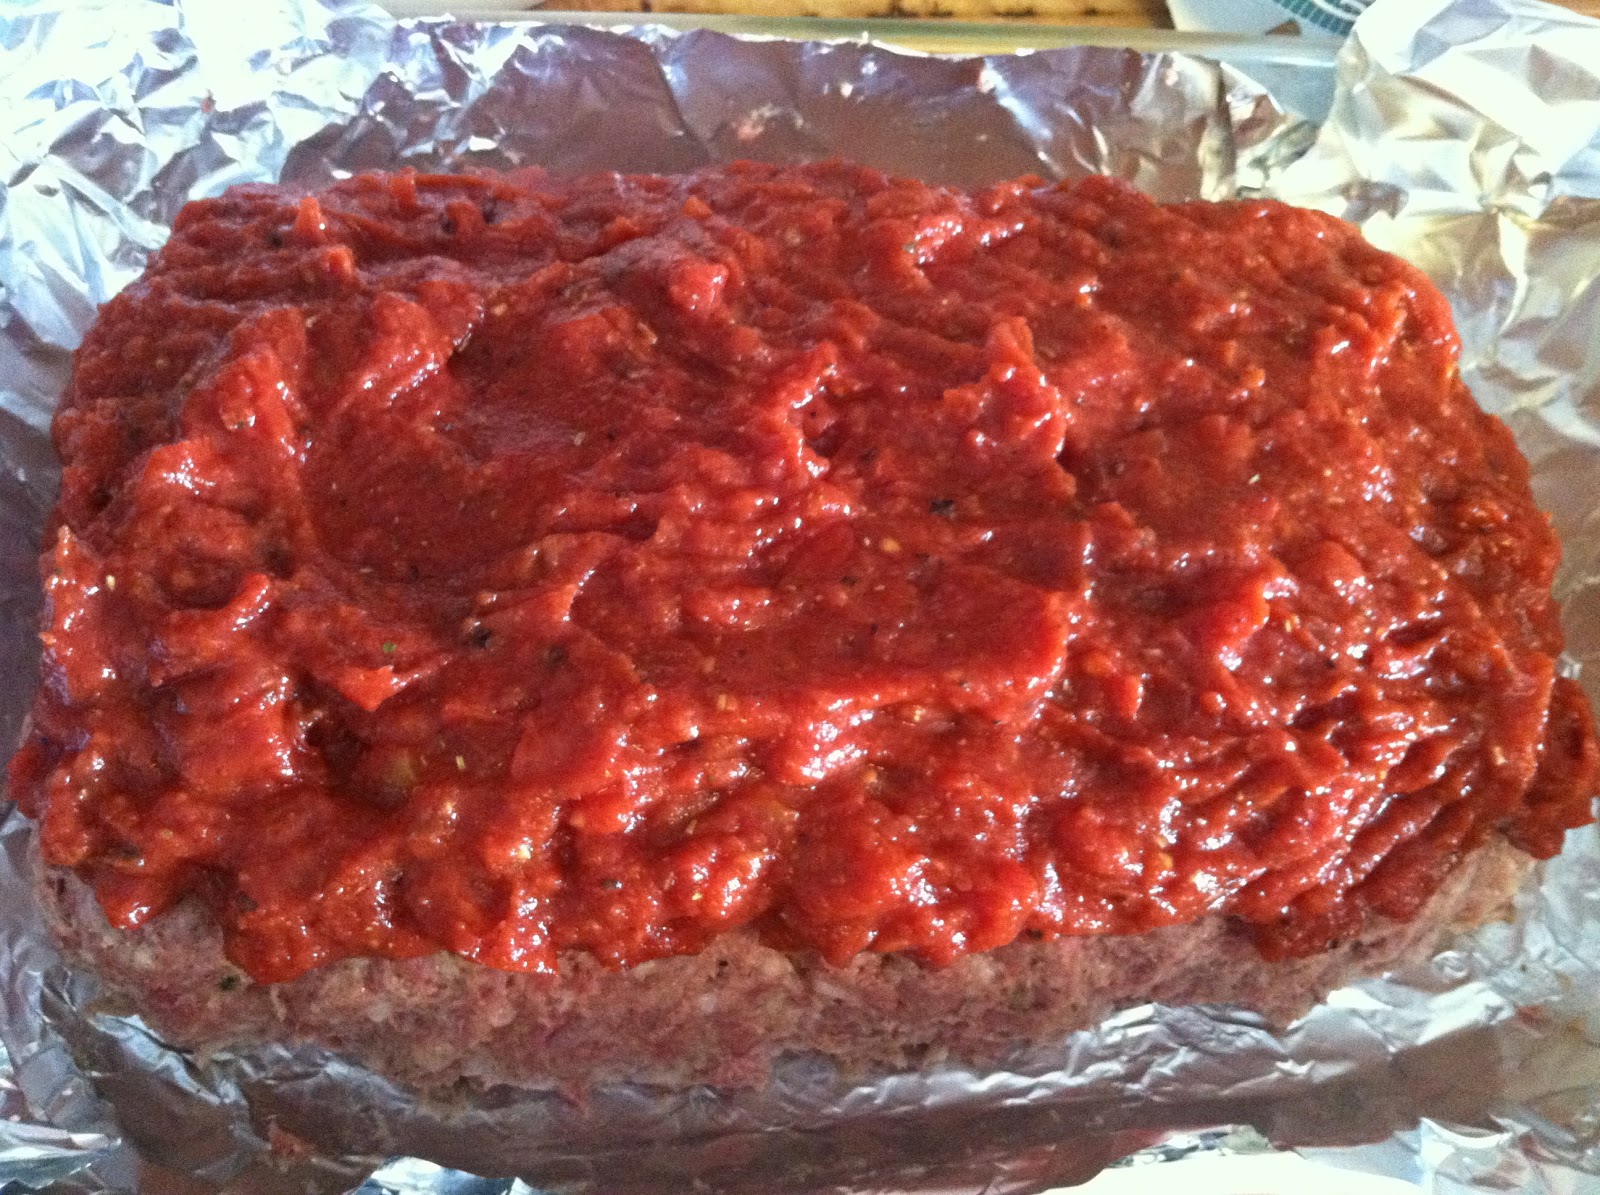
Bake, uncovered, for 1 to 1 1/2 hours, until meatloaf is completely cooked through.  If necessary in the final minutes of cooking, you can cover very loosely with foil to prevent the sauce from burning.


Let the meatloaf rest in the pan for 10 - 15 minutes before removing it to platter to cut and serve.


Enjoy!

Wednesday, March 27, 2013

Microwave Caramels

Okay, it's late, officially Wednesday, but since I'm still up, I'm calling it Thursday.  For me, Wednesday doesn't begin until I get up tomorrow morning.

Why am I up so late, you might ask?  Well, my husband finally upgraded his phone - to his first smartphone, an Iphone.  I'm happy for him, except, I am the one who got to do the activation & transfer all of his contacts.  Easy enough, if I had only remembered to backup his old phone first, which I didn't.  So, I just finished entering the last of his contacts.

Now, for a short and quick recipe.  I love, Love, LOVE good caramels!  Their soft, chewy texture, not to mention the buttery goodness that melts in your mouth.  Yummmm!  But, I hate trying to make them.  Anything that I have to use a thermometer, in order to get the right outcome, I tend to balk at.  That's why I almost jumped for joy when I saw this recipe, tried it and it turned out beautifully from the microwave.  THE MICROWAVE!  WHO KNEW GOOD CARAMELS COULD COME FROM THE MICROWAVE?!  Not me, that's for sure.

But, since I didn't know if they were going to turn out, I didn't take any pictures, except the end result.  That's really okay, though, because it was so incredibly simple, there was only one step.

Here's your Cast of Characters.

1/4 cup butter, cut in 8 pieces
1/2 cup white sugar
1/2 cup brown sugar, firmly packed
1/2 cup light corn syrup
1/2 cup sweetened condensed milk
1 teaspoon vanilla
coarse sea salt (optional)

 Line an 8x8 baking pan with aluminum foil, coat the inside with cooking spray.  In microwave safe bowl (at least 2 quart), add butter, white and brown sugar, syrup, sweetened condensed milk, & vanilla. Stir together and place in microwave, uncovered. Cook in microwave on full power for 6 minutes (for soft & chewy texture) or 7 minutes (for firmer yet still chewy texture), stopping and stirring thoroughly twice during the cooking time (every 2-3 minutes).* Remove from microwave and stir until well mixed. Pour hot caramel into prepared pan.  Sprinkle sea salt sparsely over the caramel.  You only want a hint of salt with the caramel.  Place in fridge until firm enough to remove & cut (approx. 40-60 min). Pull up on sides of aluminum foil and remove the whole slab of caramel at one time. Place caramel slap on cutting board covered with parchment or waxed paper and cut into pieces of desired size.  If the caramels are oily from the cooking spray, blot them off with a paper towel.  (I cooked mine 6 1/2 minutes and they were soft.  Next time I would cook them another 15 - 20 seconds.)

*TIP: ADJUST COOKING TIME FOR YOUR MICROWAVE WATTAGE
The recommended cooking times in this recipe are based 1100 watt microwave. If yours has a different wattage, you will most likely need to adjust the cooking time accordingly. Because microwaves vary, there may be some trial and error involved to determine exactly the correct cooking time.


Enjoy!

Sunday, March 24, 2013

Weekend Cooking Tip

Here's an idea for a cookbook holder.


I think this is brilliant!


Thursday, March 21, 2013

Parmesan Spinach Balls

This is another one of the things that my daughter asked me to make for her birthday dinner.  In fact, both of my kids have been asking me to fix them for quite a while.  I know, that may sound odd, my daughter asked for a spinach dish as part of her birthday meal, but it's the honest-to-goodness truth.  Spinach balls are a favorite of both children.  Yes, I realize that I have been blessed with kids that love a wide variety of vegetables and aren't afraid to try new things.  And, yes, I am very thankful for that.  Since these are a lot easier to make than the red velvet cake, I gladly agreed to her birthday wish. 

I did try something new this time, though:  I baked them instead of frying them in oil.  If I had a good, garlic-infused oil, I would still choose frying over baking, but otherwise, baking is a nice way to cut some fat and calories.  I just had to tweak the baking time a little, as this was my first time trying them this way.

One big key in making the spinach balls is making sure to get as much water out of the spinach as possible.  If there's too much liquid, they won't hold together.  Then you'll have spinach pancakes instead of balls, which I suppose would be okay, but then I'd have to take new pictures and change the name.  Let's just get all the water out - it will be less work for me.

Here's your Cast of Characters.


1 Lb. bag frozen, chopped spinach, thawed out
2 Eggs, beaten
1 1/2 Cups freshly shredded Parmesan cheese
2 Tsps. minced garlic
1 1/2 Tsps. Lawry's seasoning salt
1/2 Tsp. pepper
1 Tsp. onion powder
1 Tsp. garlic powder

Place spinach in a colander in the sink.  Take a handful and squeeze out all the liquid.  Put in a medium mixing bowl, along with the eggs.  Repeat until all the spinach has been drained.


Add remaining ingredients.


Stir well, making sure to thoroughly combine.


Line a large cookie sheet with foil.  Shape spinach mixture into ping pong size balls.


Bake in a 350 oven for 30-40 minutes until cooked through, and browned on both sides.  About halfway through cooking time, flip them over to get equally browned.


Enjoy!


Tuesday, March 19, 2013

Red Velvet Cake with White Chocolate Cream Cheese Frosting

Sunday was my daughter's 12th birthday.  My darling baby girl, Bailey, is not a little girl anymore.  Instead, she has turned into this smart, funny, thoughtful and sometimes frustrating tween, seemingly, overnight.  I don't know when or how, exactly, that happened, but I've had to face the fact that she's growing up.  Sometimes I struggle with the concept, but most of the time I am enjoying this new phase we're in.  We talk, really talk, now, share jokes and secrets and even enjoy shopping together.  It's a new world, but I think we're ready to brave it.

Since the kids were old enough to have an opinion, I have let them choose their birthday meals.  Anything they want, within reason.  This year, Bailey chose Linguine with Pancetta, Spinach and Shallots, Parmesan Spinach Balls and a Red Velvet Cake.  I had no problem with the meal, but it has been a long time since I've made red velvet cake so I had to dig a recipe out.  You guys know how much I love (read loathe) baking, and this cake has a lot of steps, but I wouldn't dream of telling her no on her choice of birthday cake.  The one thing I had forgotten, though, was how much this cake is worth all the work.  It isn't a chocolate cake, so you can't go into it expecting that.  It's flavor is very subtle, which is why you need a good frosting to compliment it.  I've always liked cream cheese frosting but decided to take it one step further with white chocolate.  I think you'll like it, too.

Here's your Cast of Characters for the cake.


1/2 Cup unsalted butter
1 3/4 Cup sugar
2 Eggs
2 Ounces red food coloring (2 bottles)
1/4 Cup cocoa
1 Cup buttermilk
2 1/4 Cups cake flour
1 Tsp. salt
2 Tsps. vanilla
1 Tsp. baking soda
1 Tsp. vinegar

Cream butter, sugar and eggs.


Make a paste of the food coloring and cocoa.


Add to the creamed mixture.


Add salt to flour.  Alternate adding flour and buttermilk to the batter.


Add vanilla, mixing in briefly.


Add soda to vinegar, and blend into the batter.


Pour into 2 greased and floured 9-inch cake pans.


Bake at 350 degrees for 22 - 25 minutes, or until a toothpick inserted in the center comes out mostly clean.  A couple of crumbs is okay, you don't want to overbake it.  Let cool for about 5 minutes before turning out of the pan onto wax paper.


Let the cakes cool completely before frosting.

Here's your Cast of Characters for the White Chocolate Cream Cheese Frosting.


8 Ounce tub Philadelphia Indulgence White Chocolate Cream Cheese
1 Stick unsalted butter, softened
2 3/4 Cups powdered sugar
1 Tsp. vanilla
1/8 Cup fat-free half and half

Use a mixer to cream together cream cheese and butter.


Yes, that is a whisk and not a mixer.  A few pictures down, I'll tell you why it's important to use the mixer.

Add powdered sugar, vanilla and half and half.  Beat with mixer until fluffy.


Spread a thick layer on the bottom cake, before placing second cake on top.


Use remaining frosting to cover the top and sides of both cakes.


Okay, see the slighly lumpy frosting?  That's what happens when you are in too much of a hurry to get out the hand mixer.  It tasted great, but it drove me crazy that it wasn't smooth and creamy.

Here's my birthday girl, blowing out her candles.


And, here's the Red Velvet Cake with White Chocolate Cream Cheese Frosting.


Enjoy!

Sunday, March 17, 2013

Weekend Cooking Tip

Got a few vegetables or a little leftover meat? Maybe you have some fixings for a salad or a light soup, but it’s not quite dinner. Pasta and rice are cheap, healthy pantry items that let you turn a few leftovers into a meal. Try quickly sautéing peppers and onions and toss them with noodles, herbs and a little cheese, or add rice into a vegetable soup to make it more satisfying.

Thursday, March 14, 2013

Herb-Crusted Pork Chops

Today was an unusual day.  First of all, I was awake  4 am, and couldn't go back to sleep.  After trying for about 45 minutes, I finally gave up.  It was at that point that I started thinking about dinner tonight.  That was really out of the ordinary since most days the meal gets decided on my way home from work.  I knew that we had a really nice package of pork chops in the freezer, and that's where it started.  By the time the kids had gotten up, this is what I had planned:  rosemary pork chop and potato packets.  I was going to make individual foil  packets with potatoes and onions, topped with a pork chop and everything sprinkled with a homemade rosemary seasoning blend.  That was the second thing that was weird, not only was I thinking about dinner at 5 am, but I had the whole mealed planned by 6.  What was wrong with me?

All day long, I kept dreaming about this meal.  There's just something about roasting potatoes with meat - the flavor that the potatoes take on is outstanding!  So, how did we come to have Herb-Crusted Pork Chops then?  Well, it's like this.  I planned on leaving work at 5, which meant that I would have plenty of time to get home, cut up the potatoes and onions, and get everything roasted at a decent time.  But, in reality, I didn't leave until 5:40, and I have a half hour drive home, so no pork chop packets tonight.  As I drove home, I had to call an audible.  Something that would come together and cook quickly - Herb-Crusted Pork Chops!

Even though my best-laid plans didn't pan out, the end result was a good one.

Here's your Cast of Characters.


4 Thick-cut, bone-in pork chops
2 Tsp. crushed rosemary
1 1/2 Tsp. Lawry's seasoning salt
1 Tsp., each, thyme and McCormick Perfect Pinch Garlic & Herb seasoning blend
1/2 Tsp., each, basil and black pepper
3 Tbsp. peanut oil (it needs to be peanut oil because it can withstand high heat without burning)

Mix all the seasonings together, and generously press into each side of a pork chop.  Repeat with remaining chops.


Heat oil in a large skillet on medium-high heat.  Add pork chops, cooking for 2-3 minutes per side to get a good crust.


Turn down to medium heat, and continue cooking for 20-25 minutes, until cooked through.  Turn frequently so they don't burn.


Check doneness with a meat thermoter.  Pork should be at 170 degrees.


See how searing it on medium-high heat created that nice, crispy, herby crust?


Enjoy!