Popcorn will stay fresh if you store it in the freezer. It also eliminates some kernels not popping.
Thursday, January 31, 2013

Wednesday, January 30, 2013
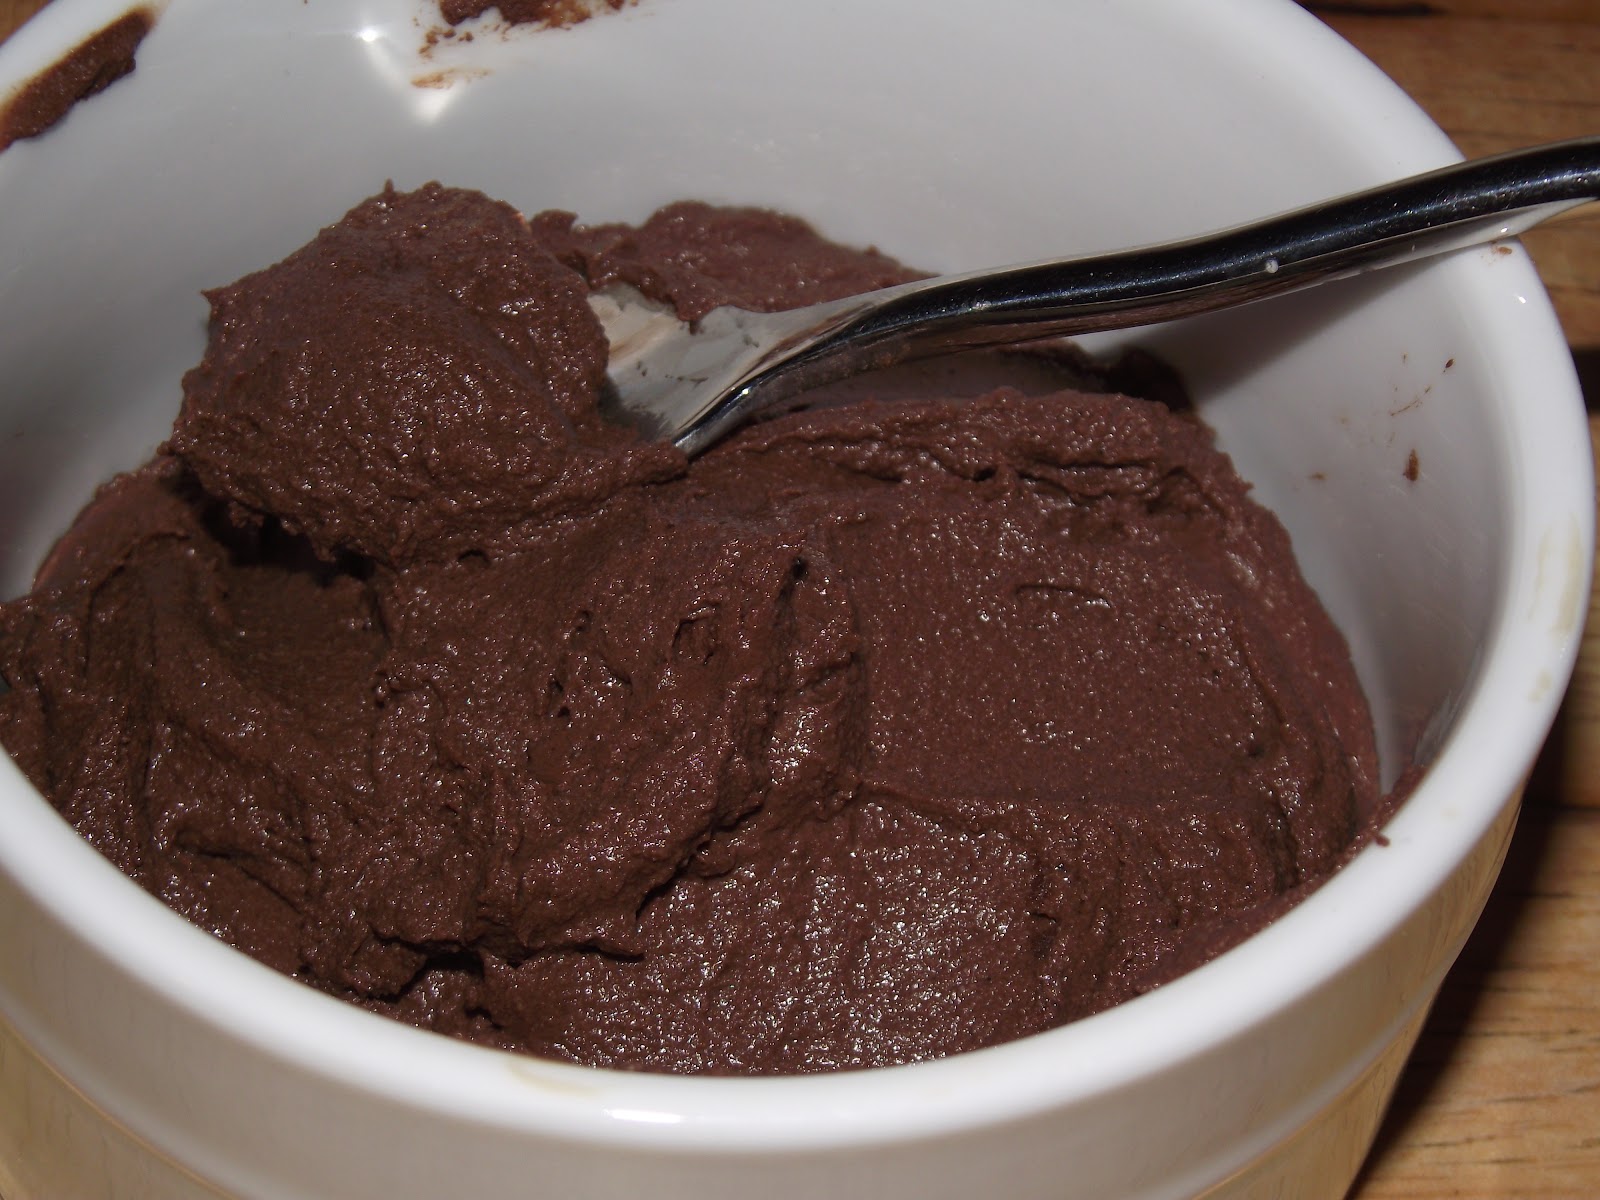
Dark Chocolate Ricotta Mousse
I have been away from home the last 2 days in meetings, for work. I wasn't really looking forward to going, but it turned out to be very interesting and worthwhile. I came away with some unexpected but excellent tools that I can't wait to put into practice. Another thing I really enjoyed was the chance to be in a town that had some different eating opportunities. On a friend's recommendation, I tried a fairly new restaurant to Bismarck - MacKenzie River Pizza, Grill & Pub. I was not disappointed. Turns out this chain started in Montana but has branched out a little to Idaho, Washington and Bismarck, ND. The decor is built around a hunting/fishing/outdoorsy theme encompassed in a lodge setting. The atmosphere was fun, the service staff really seemed to enjoy their work and the food was amazing! I had one of their small homemade pizzas (which was not small at all). One of the things I liked was that my waiter, seeing that I was having a hard time deciding between a few different types, quickly pointed out that I could split the pie in half and get 2 different ones. Beautiful! I chose the Thai Pie and the Caribbean Chicken, and couldn't have been happier, although the Thai chicken was my favorite, hands down. It had a lovely peanut sauce, Thai-spiced chicken, mandarin oranges, peanuts, mozzarella topped with fresh cilantro. One bite and I was in heaven! If you ever get a chance to eat at one of these fine establishments, I definitely encourage you to do so. It also boasts some unique microbrews for the specialty beer lovers.
By the time I got home tonight, my husband had supper made and on the table. I'm not going to lie, I almost swooned. It was a quarter to seven, my head was swirling with info from the meetings and I hadn't even contemplated what I would make, if he hadn't taken care of it. The only problem was that I needed something for the blog. I tried to think of something quick and easy with very few ingredients. Enter Dark Chocolate Ricotta Mousse. 4 ingredients, 5 minutes, and you have a rich and creamy dessert. It might not seem like it makes enough to serve more than 2, but because it is so rich, this is one of those desserts that you serve in very small portions - preferably with a good, strong coffee and a dollop of whipped cream.
Here's your Cast of Characters.

1 - 15 Oz. tub of part-skim ricotta cheese
1/4 Cup vegetable oil
3/4 Cup cocoa
3/4 Cup powdered sugar
In a small saucepan on medium heat, whisk cocoa and oil together until blended into a paste.


In a blender or food processor, add ricotta, cocoa paste and powdered sugar.


Pulse until it turns into a creamy, dreamy chocolate mousse.
I would have topped with a little of spoonful of whipped cream but I didn't have any on hand.

Enjoy!
By the time I got home tonight, my husband had supper made and on the table. I'm not going to lie, I almost swooned. It was a quarter to seven, my head was swirling with info from the meetings and I hadn't even contemplated what I would make, if he hadn't taken care of it. The only problem was that I needed something for the blog. I tried to think of something quick and easy with very few ingredients. Enter Dark Chocolate Ricotta Mousse. 4 ingredients, 5 minutes, and you have a rich and creamy dessert. It might not seem like it makes enough to serve more than 2, but because it is so rich, this is one of those desserts that you serve in very small portions - preferably with a good, strong coffee and a dollop of whipped cream.
Here's your Cast of Characters.
1 - 15 Oz. tub of part-skim ricotta cheese
1/4 Cup vegetable oil
3/4 Cup cocoa
3/4 Cup powdered sugar
In a small saucepan on medium heat, whisk cocoa and oil together until blended into a paste.
In a blender or food processor, add ricotta, cocoa paste and powdered sugar.
Pulse until it turns into a creamy, dreamy chocolate mousse.
I would have topped with a little of spoonful of whipped cream but I didn't have any on hand.
Enjoy!
Tuesday, January 29, 2013
Thursday Cooking Tip
Always read a recipe through twice before starting. The first time you might skim, but by reading it the second time, you are less likely to skip a key ingredient or step.
Monday, January 28, 2013
Linguine with Pancetta, Spinach and Shallots
Remember Friday when I was just too worn out to do more than post a very basic recipe? Well, turns out I was getting sick. My head, eyes and body hurt, not to mention my lungs felt like a huge weight had been placed on them. I spent the weekend laying around and sleeping when I could. I didn't even do any real cooking. And, this morning I was still feeling under the weather but I drug myself to work anyway. I had too much to do, to even think about staying home - I am going to be out of town the next 2 days, in meetings, so I had to suck it up. Anyway, the last thing I was thinking about was what I was going to make for dinner tonight. But somewhere in the late afternoon, I started to feel a little better and, to my surprise, this recipe started to take shape in my mind.
I was in the mood for pasta, but didn't want anything too heavy. I mentally ran through what I had on hand in my pantry and freezer and decided that I wanted linguine with spinach. Initially, I thought about using frozen spinach, but couldn't decide what else I wanted to go with it. Then, out of the blue, it hit me - pancetta! What goes great with spinach? Pancetta! Well, if I was going to splurge a little on the pancetta, I certainly wasn't going to use frozen spinach. Like an imaginary whirlwind in my head, it all came together: linguine, baby spinach, garlic slivers, pancetta and freshly grated Parmesan. I couldn't wait to go to the grocery store to grab the pancetta and baby spinach, so I could hurry home and get it started. While I was in the produce department, my eyes wandered past the garlic bulbs and landed upon a basket of beautiful shallots. Hey, hey, hey! Those would be go nicely, thank you very much.
I scurried home and commenced to chopping, cooking and boiling. At the risk of sounding conceited, this was one of those times that everything just come together perfectly. Everything was spot on. All the flavors were in harmony. I didn't even find myself critiquing it as we ate, making changes to the recipe, as is the case many times. It's one of those dishes that proves you don't need a heavy sauce or a ton of seasonings to make something worthwhile. It's light on ingredients but packs a wallop in flavor.
Here's your Cast of Characters.

1/2 Lb. pancetta (Don't be tempted to substitute bacon!)
1/2 Bag baby spinach
1 Large shallot
5 Cloves garlic
1/3 Cup olive oil
1 Teaspoon, each, freshly ground pepper, kosher salt and McCormick Perfect Pinch Tuscan seasoning blend
1 Lb. linguine
1/2 Cup freshly shredded Parmesan
In a large saute pan, warm olive oil on medium-low.
Pancetta should be cut into 1/2" thick slices from the deli.

Chop pancetta into bite-size pieces and throw into the pan, turning heat up to medium.

Cut shallot into thin wedges, and add to the pancetta. Stir frequently to keep from burning.

Peel the garlic and slice into thin slivers before adding to the pan.


Continue stirring until the pancetta starts to crisp a little and the garlic is golden.

Once they reach this stage, bring a pot of salted water to a boil and cook linguine 6 - 7 minutes, or until al dente. Continue crisping pancetta until garlic is brown.

Turn to low. When there is 2 minutes left on the pasta, add the spinach and seasonings to the saute pan. Stir well and frequently.

Drain pasta and add to the pancetta and spinach. Toss well.

Add Parmesan cheese, and continue to toss until the cheese is mixed in very well.

Serve immediately while pasta is piping hot.

Enjoy!
Friday, January 25, 2013
Game Day Spicy Chili Cheese Dip
As this week comes to a close, I am worn out. Work has been crazy busy, which is good, but I am all in. I have no grand recipe up my sleeve tonight. It was all I could do to come up with something quick and simple. I actually thought about skipping the blog in favor of going to bed early, but just couldn't do it. The guilt started to kick in at the very idea. Then I realized that, with Super Bowl next weekend, this recipe was very timely. So please forgive the briefness of the post. I can't seem to muster anything very interesting or witty to say. All I can focus on is the moment when I get to watch the back of my eyelids.
Now, for the recipe, most of you will recognize the base as a classic party dip: velveeta, sausage and beanless chili. That's good, but I like to add more depth to it. Give it a little more weight. Change things up a bit, because if you've learned anything about me, it's that I can't leave any recipe as is. I don't believe it's in my genetic makeup.
Here's your Cast of Characters.

2 Lbs. pork sausage (1 lb. hot and 1 lb. regular)
Large jar medium queso dip (I used a 23 oz. jar)
2 - 10 Oz. cans rotel tomatoes with lime and cilantro
2 - 15 Oz. cans beanless chili (1 hot and 1 regular)
(For added heat, I throw in some chopped, pickled jalapeno slices. I was just too tired to mess with chopping tonight.)
In a medium pot, brown sausage over medium heat, breaking up any large chunks as it cooks.

Dump in remaining ingredients and stir well.


Let this cook on medium heat for about 10-15 minutes; just until heated through and flavors have blended.

Grab a bunch of friends and serve with your favorite chips.

Enjoy!
Now, for the recipe, most of you will recognize the base as a classic party dip: velveeta, sausage and beanless chili. That's good, but I like to add more depth to it. Give it a little more weight. Change things up a bit, because if you've learned anything about me, it's that I can't leave any recipe as is. I don't believe it's in my genetic makeup.
Here's your Cast of Characters.
2 Lbs. pork sausage (1 lb. hot and 1 lb. regular)
Large jar medium queso dip (I used a 23 oz. jar)
2 - 10 Oz. cans rotel tomatoes with lime and cilantro
2 - 15 Oz. cans beanless chili (1 hot and 1 regular)
(For added heat, I throw in some chopped, pickled jalapeno slices. I was just too tired to mess with chopping tonight.)
In a medium pot, brown sausage over medium heat, breaking up any large chunks as it cooks.
Dump in remaining ingredients and stir well.
Let this cook on medium heat for about 10-15 minutes; just until heated through and flavors have blended.
Grab a bunch of friends and serve with your favorite chips.
Enjoy!
Thursday, January 24, 2013
Thursday Cooking Tip - Wilted Celery
To revive wilted celery, cut off the root end, place in a large glass of water and refrigerate.
Wednesday, January 23, 2013
Meyer Lemon Upside-Down Cake
Can you believe I almost forgot to write a post tonight? Actually, it wasn't that I forgot, per se, it was that I forgot it was Wednesday. The week is flying by, and I completely lost track of what day it is. Suddenly it was 8:30 and it hit me!
As you can see from the title, I am still infatuated by those beautiful Meyer lemons. Although, I have moved on to some of the other delectable citrus fruit that is so perfect right now: Blood Oranges, Minneolas, Cara Cara Oranges and Honey Tangerines. The way I see it, peak citrus season coinciding with those frigid winter months is nature's way of apologizing to mankind. I don't know about you, but I'm good with that. And, by the way, if you haven't tried Honey Tangerines, do whatever you have to do to track some down. They are unbelievably sweet, and on my short list of new favorite fruits.
Back to the Meyer lemons, I searched the internet to find some different recipes and came across this. The picture was gorgeous, and based on that, alone, I had to try it. My husband freaked out a little at the idea of eating the caramelized peels, but I convinced him to try it anyway. The butter and sugar transform it to nothing short of candied peels with bursts of that signature Meyer lemon flavor. Mmmmmmm!
Here's your Cast of Characters.

6 Small Meyer lemons (zest and juice 3 of the lemons)
1/2 Cup plus 2 tablespoons unsalted butter, divided
3/4 Cup packed brown sugar
2 Cups flour
1 1/2 Teaspoons baking powder
1/2 Teaspoon salt
3/4 Cup Sugar
2 Eggs
1/2 Cup milk
1 Teaspoon sea salt flakes

I know you've seen measuring spoons before but I had to share these little beauties. My best friend, Michelle, got them for me as part of my Christmas present, along with a couple of beautiful plates and tiny little silverware. She figured they might come in handy while taking pictures for the blog. Isn't she thoughtful?!
Preheat oven to 350.
Cut the remaining 3 lemons into 1/8" thick slices. Remove seeds and set aside. You should have about 30 slices.

Heat 4 tablespoons of butter in a 10" cast iron skillet or an ovenproof 10" saute pan until melted. Brush the sides of the skillet with a little of the melted butter.

Add the brown sugar, stir until it is moistened with the butter and spread it into an even layer.

Arrange the lemon slices, slightly overlapping, to cover the bottom of the skillet.

Set aside. Cut the remaining 6 tablespoons butter into a mixing bowl, along with the zest. Beat the butter, scraping down the sides of the bowl, until creamy.


Add the sugar and beat until light and fluffy.

Beat in the eggs one at a time.

Add half the flour, along with the baking powder and salt, and beat until well-blended. Add milk and juice, and mix well.

Mix in the remaining flour, until well combined.

Sprinkle sea salt flakes evenly over the lemon slices.

The little bit of salty flavor enhances the sweetness of the caramelized lemon peels.

Carefully spread cake batter over the lemons.

Bake 30 - 40 minutes, or until the cake is golden and a toothpick inserted in the center comes out clean.

Let the cake rest for 5 minutes before inverting onto a platter.

The cake should cool completely before serving. If possible, make the day before as the flavor is much better the next day. To serve, slice into wedges using a sharp knife that will cut easily through the peels.

The cake is denser, more like coffee cake.
Enjoy!
As you can see from the title, I am still infatuated by those beautiful Meyer lemons. Although, I have moved on to some of the other delectable citrus fruit that is so perfect right now: Blood Oranges, Minneolas, Cara Cara Oranges and Honey Tangerines. The way I see it, peak citrus season coinciding with those frigid winter months is nature's way of apologizing to mankind. I don't know about you, but I'm good with that. And, by the way, if you haven't tried Honey Tangerines, do whatever you have to do to track some down. They are unbelievably sweet, and on my short list of new favorite fruits.
Back to the Meyer lemons, I searched the internet to find some different recipes and came across this. The picture was gorgeous, and based on that, alone, I had to try it. My husband freaked out a little at the idea of eating the caramelized peels, but I convinced him to try it anyway. The butter and sugar transform it to nothing short of candied peels with bursts of that signature Meyer lemon flavor. Mmmmmmm!
Here's your Cast of Characters.
6 Small Meyer lemons (zest and juice 3 of the lemons)
1/2 Cup plus 2 tablespoons unsalted butter, divided
3/4 Cup packed brown sugar
2 Cups flour
1 1/2 Teaspoons baking powder
1/2 Teaspoon salt
3/4 Cup Sugar
2 Eggs
1/2 Cup milk
1 Teaspoon sea salt flakes
I know you've seen measuring spoons before but I had to share these little beauties. My best friend, Michelle, got them for me as part of my Christmas present, along with a couple of beautiful plates and tiny little silverware. She figured they might come in handy while taking pictures for the blog. Isn't she thoughtful?!
Preheat oven to 350.
Cut the remaining 3 lemons into 1/8" thick slices. Remove seeds and set aside. You should have about 30 slices.
Heat 4 tablespoons of butter in a 10" cast iron skillet or an ovenproof 10" saute pan until melted. Brush the sides of the skillet with a little of the melted butter.
Add the brown sugar, stir until it is moistened with the butter and spread it into an even layer.
Arrange the lemon slices, slightly overlapping, to cover the bottom of the skillet.
Set aside. Cut the remaining 6 tablespoons butter into a mixing bowl, along with the zest. Beat the butter, scraping down the sides of the bowl, until creamy.
Add the sugar and beat until light and fluffy.
Beat in the eggs one at a time.
Add half the flour, along with the baking powder and salt, and beat until well-blended. Add milk and juice, and mix well.
Mix in the remaining flour, until well combined.
Sprinkle sea salt flakes evenly over the lemon slices.
The little bit of salty flavor enhances the sweetness of the caramelized lemon peels.
Carefully spread cake batter over the lemons.
Bake 30 - 40 minutes, or until the cake is golden and a toothpick inserted in the center comes out clean.
Let the cake rest for 5 minutes before inverting onto a platter.
The cake should cool completely before serving. If possible, make the day before as the flavor is much better the next day. To serve, slice into wedges using a sharp knife that will cut easily through the peels.
The cake is denser, more like coffee cake.
Enjoy!
Tuesday, January 22, 2013
Tuesday Cooking Tip - Baked Potatoes
Potatoes will bake in a hurry if they are boiled in salted water for 10 minutes before placing them in a very hot oven.
BONUS: Cut a thin slice from each end of the potato to speed up the baking process.
BONUS: Cut a thin slice from each end of the potato to speed up the baking process.
Monday, January 21, 2013
Easy Flour Tortillas
Okay, let me begin by saying, I have never taken issue with store-bought tortillas. Quite the contrary, there are actually several brands that I really like. They're soft, pliable and have good flavor. So, that is not why I decided to make homemade tortillas. It wasn't because I suddenly had the desire to see if I could make them either. Nope, necessity truly is the mother of invention. A couple of weeks ago I had a hankering for chicken mole enchiladas, and had everything to make them except tortillas. You know how it goes when you really want something but don't have all the ingredients to make it; you can't get it out of your head. That was me - completely obsessed. Once I came to grips with the fact that my stubborn self wasn't going to give up on the enchiladas, I googled easy flour tortillas. I quickly found one that looked promising and read the reviews. After incorporating some tips from said reviews, I was ready to give it a whirl.
Now, here's where I have to convince you of something. It's really important. It's kind of a big deal so you need to trust me on this. Are you ready? The key ingredient is lard. There, I've said it, and before you get all up in arms, I know it's not good for you. I don't make a habit of using it all the time but there are certain instances that shortening or butter just doesn't cut it: pie crusts, rolls and my big, fat, fluffy biscuits. This is one of those times. However, if you can't bring yourself to use lard, you can substitute shortening, but I will frown on it. Just so you know. Seriously, though, lard does make these super soft and pliable. All I'm asking is that you'll consider using it.
Here's your Cast of Characters.

2 Cups flour
1/2 Teaspoon salt
1 Teaspoon baking powder
1 Tablespoon lard
3/4 Cup water
Whisk flour, salt and baking powder together in a medium mixing bowl. Use pastry blender to cut lard into mixture, until the flour looks like cornmeal.


Add the water and mix until the dough just comes together.

With your hands, work the dough for about 30 seconds, until everything is well combined. Be careful not to overmix or the dough will be tough, making chewy tortillas, and not in a good way.

Take a small piece of dough and form a ball.

On a lightly floured surface, roll dough into a very thin round. You'll need to turn it over as you are rolling it out, dusting each side with flour so it doesn't stick.


Continue rolling out remaining dough. Depending on the size you make, you should get 8 - 10. I made bigger ones, and got 8 large tortillas.
Preheat a large, nonstick skillet on medium high. Once the skillet is hot, place a tortilla in it.

Cook until the tortilla starts to bubble, about 1 minute.

Flip over and cook on the other side for about 30 seconds.

Take out, wrap in foil and place in warmed oven until the rest are done.

Serve while warm. I made fish tacos with southwest broccoli slaw and cilantro lime sour cream.

These are so easy and taste so much better than store-bought, I don't know that I will buy tortillas again.

Enjoy!
Now, here's where I have to convince you of something. It's really important. It's kind of a big deal so you need to trust me on this. Are you ready? The key ingredient is lard. There, I've said it, and before you get all up in arms, I know it's not good for you. I don't make a habit of using it all the time but there are certain instances that shortening or butter just doesn't cut it: pie crusts, rolls and my big, fat, fluffy biscuits. This is one of those times. However, if you can't bring yourself to use lard, you can substitute shortening, but I will frown on it. Just so you know. Seriously, though, lard does make these super soft and pliable. All I'm asking is that you'll consider using it.
Here's your Cast of Characters.
2 Cups flour
1/2 Teaspoon salt
1 Teaspoon baking powder
1 Tablespoon lard
3/4 Cup water
Whisk flour, salt and baking powder together in a medium mixing bowl. Use pastry blender to cut lard into mixture, until the flour looks like cornmeal.
Add the water and mix until the dough just comes together.
With your hands, work the dough for about 30 seconds, until everything is well combined. Be careful not to overmix or the dough will be tough, making chewy tortillas, and not in a good way.
Take a small piece of dough and form a ball.
On a lightly floured surface, roll dough into a very thin round. You'll need to turn it over as you are rolling it out, dusting each side with flour so it doesn't stick.
Continue rolling out remaining dough. Depending on the size you make, you should get 8 - 10. I made bigger ones, and got 8 large tortillas.
Preheat a large, nonstick skillet on medium high. Once the skillet is hot, place a tortilla in it.
Cook until the tortilla starts to bubble, about 1 minute.
Flip over and cook on the other side for about 30 seconds.
Take out, wrap in foil and place in warmed oven until the rest are done.
Serve while warm. I made fish tacos with southwest broccoli slaw and cilantro lime sour cream.
These are so easy and taste so much better than store-bought, I don't know that I will buy tortillas again.
Enjoy!
Subscribe to:
Posts (Atom)