I can't tell you how many hours I have spent scouring the internet, over the last few years, looking for good bread and roll recipes. I would carefully look through the ingredients, trying to find something that looked close to what my grandma made. I always read a number of reviews, just to make sure the recipe didn't have any surprise flaws. Then I would give it another go. Every time I would wait with bated breath until they were finished, hoping that these would finally conquer my breadmaking curse. Yet, every time my hopes were crushed. They either didn't rise, were very heavy and dense, or both. It would take months for me to work up the courage to try again. Why didn't I give up, you might ask? Well, that is just not an option for me. I hate having something that I can't do. Maybe my friend is right because it does kind of drive me crazy.
Finally, a couple of months ago I dug out the Roberts Family Cookbook and turned to my Grandma's light roll recipe. I have never tried it before because, honestly, it intimidated me a little - not because there were a lot of ingredients or anything, but because there weren't a lot of measurements either. For those of you who know me and the way I cook, you might find that hard to believe since I don't like to measure either, but when it comes to baking and breadmaking, you kinda have to measure. Otherwise, bad things happen. I decided to try and figure out the measurements based on my many memories of watching Grandma make them.
Let me tell you, my persistence is going to pay off for you because I finally did it! I made good rolls! That first time, the house was filled with that wonderful aroma of yeast bread baking, and I was transported back to Grandma's kitchen. When I tasted a warm one, my knees buckled a little, it was so yummy! My grandma's were better, but I'm working on it.
Here are some things that I have discovered about working with yeast dough. Pay attention because these are very important! Always use fresh yeast. Check the expiration dates and don't use it if the date has passed. For nice, light and airy rolls or bread, do NOT overwork the dough! This is a huge one. Do not knead it too much. The rolls or bread will be very heavy. Lastly, don't rush it. I am not a patient person so this is a hard one for me, but it's key in this process. When the dough is rising, keep it warm and let it go as long as it needs to in order to double in size. Okay, that's all the secret wisdom that I have accrued. You should be well armed to go out and make these for yourself. May the force be with you! (I don't even know why I just said that! I am not a Star Wars fan. I have never even watched one of the movies.)
Here's your Cast of Characters.

4 Cups very warm water
1 Package of active dry yeast (Quick rise yeast was pictured but I wasn't happy with the results. The pictures are from regular yeast.)
1/2 Cup sugar
1 Large handful of salt
2 Tablespoons lard, melted (It really does make the rolls and bread better, but if you don't want to use it, you can substitute shortening.)
11-12 Cups flour
And, here is the really important piece.

Yep, a bowl, but not just any bowl. A big-a**, well a big bowl, preferably crock or glass. I can't tell you how much you need a huge bowl!
If you have an oven that has a "Keep Warm" setting, turn it on the lowest setting. If not, heat to the lowest temp possible, and turn off as soon as it gets there. Let it cool slightly while you are making the dough.
In a medium bowl, add yeast to the water.

Let it sit until yeast has dissolved, about 5 minutes. It should look something like this when you are done.

Meanwhile, in your huge bowl, put about 11 cups of flour. Make a well in the center, and add the sugar and salt.

When the yeast is done, add the lard to the well first. Then slowly add the yeast water.


Mix just until the dough gets thick. DO NOT OVERMIX!

Turn dough out onto a lightly floured surface.

Knead until the lumps are out and the dough is slightly elasticky (yes, it's a word). Again, DO NOT OVERWORK THE DOUGH! It should only take a minute or two to get the lumps out.

Let the dough rest on the floured surface for a few minutes. Wash your big bowl in the meantime, and then lightly grease it.

Place dough in your bowl, and cover it with a light towel.

If you had your oven on "Keep Warm", turn off now. If your bowl is oven safe, place it in the warm oven to rise. If not, find the warmest spot for the dough, but it may take a little longer for it to rise. You want it to double in size. (For me, in the oven, the first rise took 1 - 1 1/2 hours.)

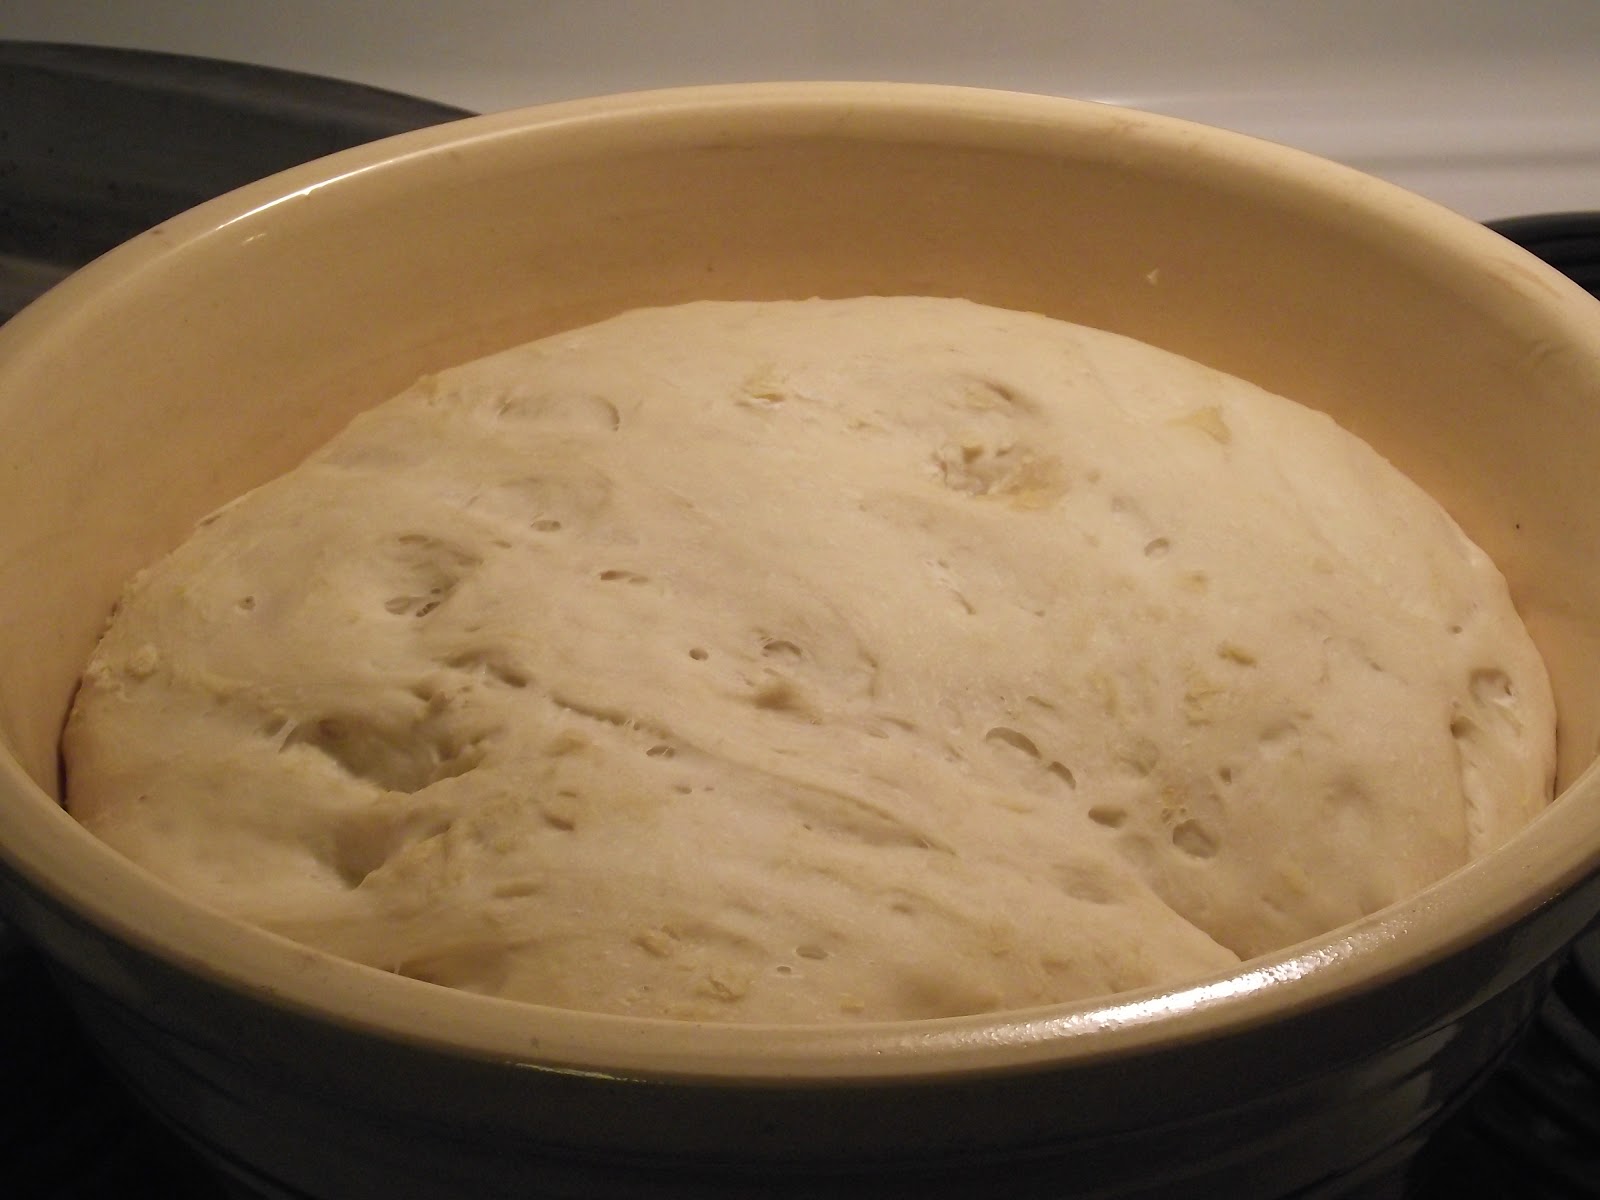
Punch the dough down. Then take it from the bowl, and gently give it a couple of quick kneads before placing back in the bowl.


Cover again, and put it back in the oven, or warm place, until it doubles in size, once more. About 45 minutes - 1 hour.
Now you are ready to make the rolls or loaves of bread. I usually do 2 loaves, and the rest rolls. Somewhere between 1 1/2 - 2 dozen. Spray your pans with nonstick cooking spray. When making the rolls, just pinch off a piece of dough slightly smaller than a tennis ball. (Here's a little tip, if you want flatter, bigger rolls then space them out a little in your pan. If you want taller, fluffy rolls, crowd them in the pan a bit. I made the flatter ones, which are good for sandwiches, burgers or sloppy joes.

For loaves, form the dough into a thick log, and place in greased pans.

Place back in the oven and let rise for the last time, until double in size. (Here's another tip, turn oven back to keep warm while you are making the loaves and rolls, and turn off when you are ready to put them back in.) This usually takes about an hour.


Take out, and heat oven to 375. Bake bread 45 minutes - an hour, depending on how big the loaf is, and rolls about 20 minutes. Take out when they are a deep, golden brown and sound hollow when thumped.


These are so good, fresh from the oven, piping hot and butter dripping from them!


Even better is with a little honey drizzled over the the melted butter. That is all kinds of awesomeness!

Enjoy!

No comments:
Post a Comment