Saturday, October 27, 2012

Better than Manwich Sloppy Joes

When I was a kid, Manwich sloppy joes were a mainstay in our house.  It was cheap, and it stretched a pound of burger out to easily feed four kids and my dad.  Plus, it was something simple that he could cook.  My dad does many things really well, but at the time, cooking wasn't one of them.  I can remember coming home from kindergarten one day, and he had made chocolate pudding, the cooked kind.  He gave me a bowl for my snack.  I loved chocolate pudding, but this just didn't taste right, and I told him that.  He took a bite and told me it was fine, and to eat it.  I took another bite, and told him something was wrong with it and I couldn't eat it.  He was irritated, but said fine, that my brothers would eat it when they came home.  Well, that didn't happen either.  Neither one of them liked it or would eat it.  That's saying something for my oldest brother because he was a garbage can - he'd eat anything that didn't run away!  Many years later, I was talking to my dad about that story and he told me that the pudding had scorched but he didn't think I would notice.  Nice try, Dad, but even then, I knew what tasted good, and that wasn't it! 

I'm not saying that he burned everything or that he was a bad cook, he was just very limited and unimaginative.  We had steaks and pork chops sometimes, and he could fix them well enough, but we also had a lot of fried hot dogs and bologna.  That's probably why I loved Manwich so, it was definitely a welcome change from hot dogs and bologna, which I won't touch now.

Once I left home, it was many years before I had Manwich again - probably four or five years ago.  We were at someone's house and they made sloppy joes with it.  You know what, it still tasted good!  Maybe it was because I was really hungry, or maybe it was the nostalgia, I'll never know.

Anyway, as much as I like Manwich, I have adapted a Rachael Ray sloppy joe recipe that puts it to shame.  After fixing it, I will never go back to the canned variety again, and I would be willing to bet that you won't either.  Here's your Cast of Characters.


1 Lb. of very lean ground beef
Lawry's season salt
Pepper
1 - 2 Tablespoons McCormick Montreal seasoning
1/4 Cup brown sugar
1 Medium onion, chopped
1/2 Yellow or Orange sweet bell pepper, chopped
2 Tablespoons, each, red wine vinegar (apple cider vinegar can be subbed) and Worcesterhire sauce
2 Cups tomato sauce
1 Small can tomato paste
Thick rolls or hamburger buns

In a medium skillet, break ground beef up and start browning on medium-low heat.  Sprinkle Lawry's and pepper generously over it.


Add brown sugar and Montreal seasoning.  I use 2 tablespoons of Montreal seasoning, but start out with 1, and add more later, if needed.


Stir well, until all mixed in.  Add onions and yellow pepper.


Continue cooking until hamburger is browned and onions and peppers are starting to get tender, about 10 minutes.

Add vinegar and Worcestershire sauce.  Stir well, and cook for another 5 minutes.

Next, add the tomato sauce and paste.  Blend well.


Cook for another 5 minutes, allowing flavors to get to know each other.

Sample it, and season with more Montreal or vinegar and worcestershire.  Just play with it until it suits your particular tastes.

Serve on big roll or bun.  (These are my Grandma Roberts' light rolls again.  Maybe tomorrow I'll share the recipe for them.)


Enjoy!

*By the way, over the last few years, my dad has turned out to be quite a good cook.  He even goes so far as to make some candy!  Who knew?!*

Friday, October 26, 2012

Breakfast Biscuit Surprises

Weekends around my house are filled with all kinds of fun things like cleaning, laundry, running errands, grocery shopping and sometimes to sporting events that my kids are involved in (okay, the last one is fun - just checking to see if you were paying attention).  It's usually 48 hours of jam-packed chaos.  For that reason, I try to have some quick and easy breakfast ideas on hand, particularly for Sundays.

I always plan a big meal for Sunday dinner, in keeping with the tradition that my Grandma Souders started when I was a kid (actually, it's lunch, but it was always called Sunday dinner).  It's our biggest meal of the week.  Things like barbecued ribs, lasagna, meatloaf or roast beef are the frequent stars on my table because I have the time to prepare them.  That means I start cooking almost right away in the morning.  If that's the case, the last thing I want is a big, involved breakfast.

I confess, we often keep Pillsbury canned cinnamon rolls on hand, just for something that doesn't take any time or fuss.  Other times, I will do something simple like French toast.  Or, if I'm really lucky, my daughter will volunteer to make muffins.  She makes a mean lemon poppyseed!  Then, there are times, like last week, where I just wing it.  Sometimes, those turn out to be the best breakfasts, when there's little or no planning involved.

That's how this recipe came about.  We were planning to go to my in-laws for a nice family dinner, so breakfast didn't need to be a big deal. We just needed something small, and fast.  This fit the bill.

So, if you're looking for a quick and easy breakfast, this is the ticket!  Here's your Cast of Characters.


12 Biscuits, if they are the frozen variety, let them thaw out
6 Breakfast sausage links
3 Sticks of cheddar/mozzarella cheese, or 12 cubes of your favorite cheese (Get wild & crazy, try pepper jack!)

Preheat oven to 400.  Spray 12 muffin cups with nonstick cooking spray.

Microwave the links for about a minute, so they are thawed out and slightly warm.  Cut each one in half, and each cheese stick (if that's what you are using) into 4 pieces.


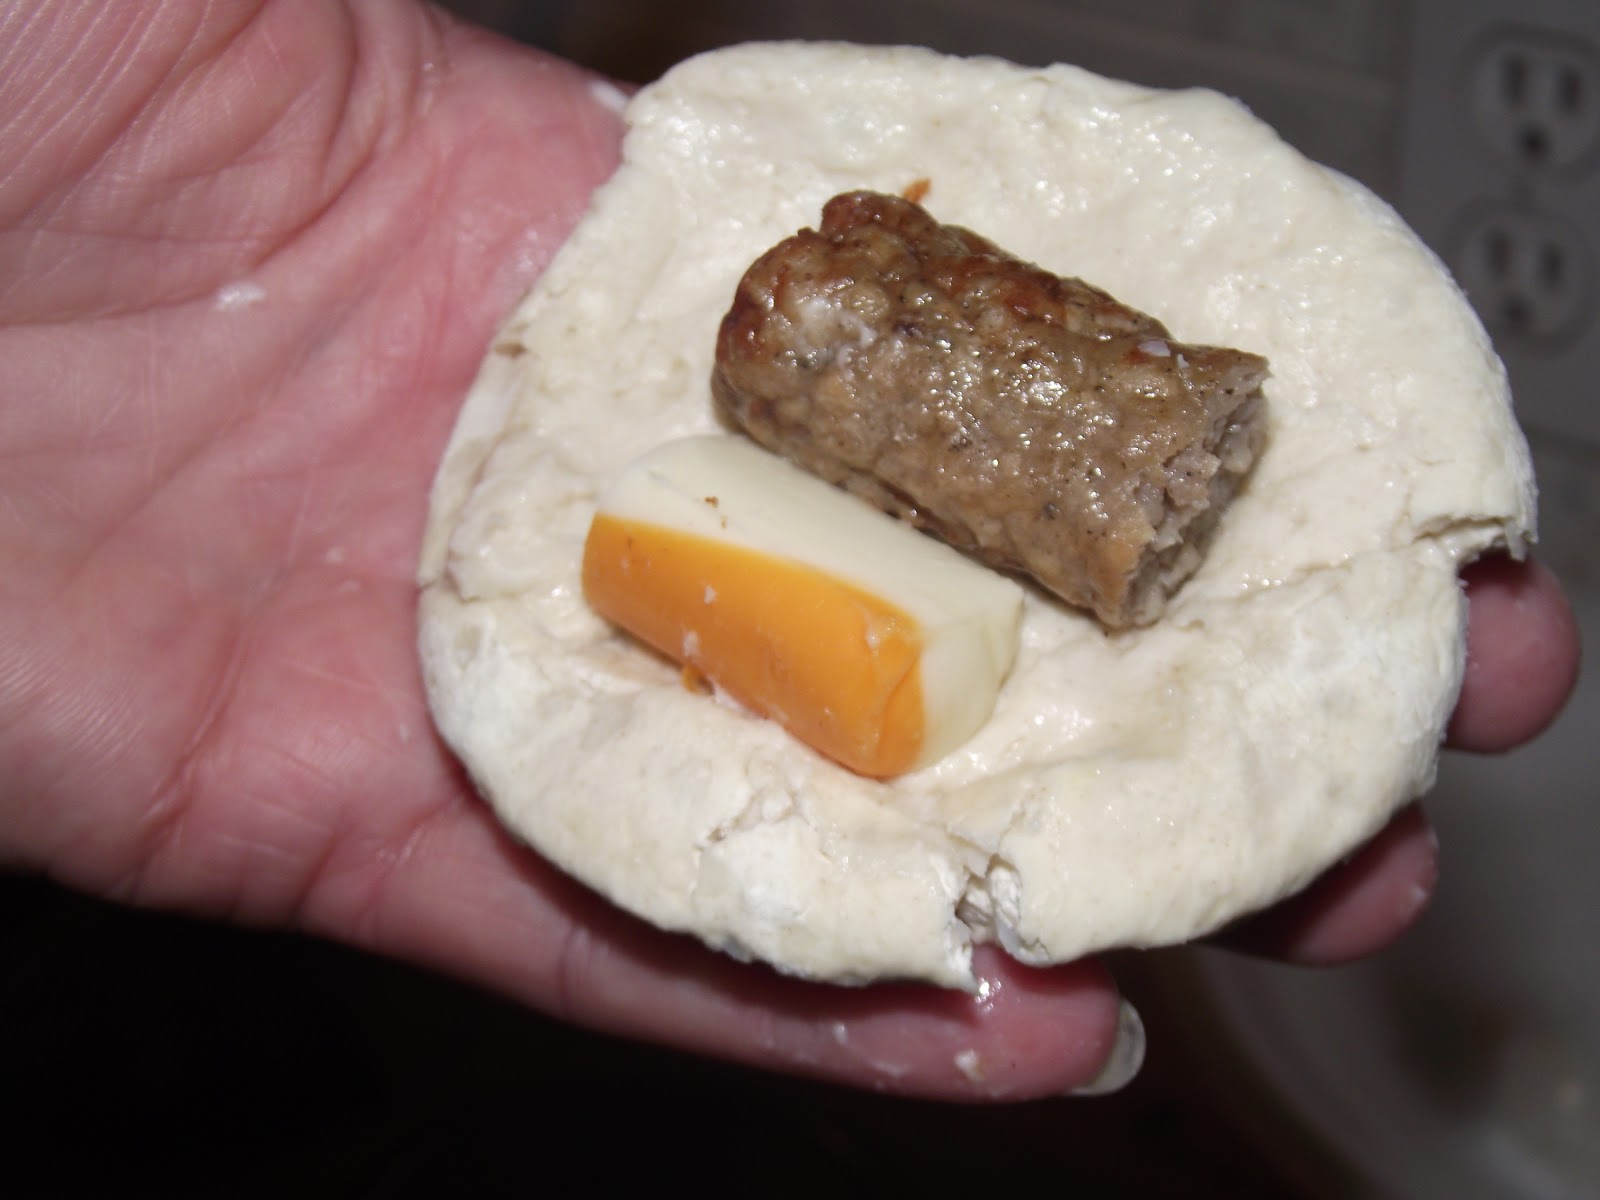
Take a biscuit and use your fingers to flatten it out a little.  Place one piece of sausage & cheese into the center.


Fold the biscuit over, and smoosh it together.


Next, pat and round it, like you are making a snowball.  Place into the muffin cup, rounded side up.


Sprinkle each one lightly with Lawry's season salt and pepper.


Bake for 25 - 30 minutes, until biscuits are golden brown.


Serve with a little pat of butter on each one.


Enjoy!


*Note:  If you want to be more adventurous, warm up some maple syrup and drizzle over the top.

Thursday, October 25, 2012

Italian Cheese Penne and Peas

Italian Cheese Penne and Peas.  Wow!  When I came up with the name, I wasn't trying to make it rhyme.  That was just a happy little coincidence.  It has a nice ring to it, though.  Even better than the name, are the flavors in this pasta dish, mainly garlic and good Italian cheeses.

I guess I could have called it Mac and Cheese, but that really would have downplayed, and insulted, it.  After all, this isn't your everyday elbow noodles with powdered cheese.  Nosirree!  This is mac & cheese's high-brow cousin.  Not that it's snobby.  No, this is a friendly, outgoing pasta.  It practically begs you to try it.  It just doesn't want to be confused with the boxed variety, that's all.  And, there's nothing wrong with that.  I mean, if you were this many levels beyond mac and cheese, you wouldn't want people calling you by the wrong, generic name either.

Really, if anyone deserves to be called a snob in this post, it would be me.  I freely admit that I do not like pre-processed, boxed macaroni and cheese.  Don't get me wrong, I used to eat it when I was a kid and thought it was great.  But, as an adult, I know we can do better, and it's not even that hard to do.  Once you see how easy it is, you won't be satisfied with that humdrum box anymore.  Are you ready to raise the bar?

Here's your Cast of Characters


1/2 Box of penne pasta

2 Tablespoons butter

2 Tablespoons flour

1 Cup chicken broth (This isn't pictured.  I forgot to take it out for the photo.  Woopsiedoodle!)

1 Cup shredded Italian blend cheese

1/2 Cup freshly shredded Parmesan (Not the canned Parmesan that's pictured.  I had this out for the Tilapia and forgot to grab my block of Parmesan.  Sorry for the confusion! I am just on fire tonight, aren't I?)

1 Teaspoon, each, Lawry's season salt, pepper, McCormick Perfect Pinch Garlic & Herb, Mrs. Dash Onion & Herb & chicken bouillon granules (You'll see me add chicken bouillon granules to a lot of recipes.  I don't add enough to make things taste all chickeny - yes, that's a word - but it's gives a depth of flavor that I love.)

1/2 Sicilian blend seasoning (I use a McCormick blend.  You can use any variety you find, but it does need to be Sicilian and not Italian.  Even though it's a small amount, it's huge in taste, and it's not the same flavor as Italian.)

1 Bag of frozen peas

Preheat oven to 375.  Spray a large casserole with nonstick cooking spray. 

Cook pasta to al dente - usually 10 minutes but go by the box for the least amount.

Meanwhile, melt butter on medium heat in a skillet, preferably cast iron if you have it.  Once it's all melted, add flour to make a roux.


Stir frequently to keep from burning.  This is important because a good roux is the backbone of your bechamel sauce (white sauce).  If it's not good, your sauce is not going to be good.


Continue cooking until it becomes a rich caramel color.  A little side note, the darker the roux gets, the nuttier it tastes.  Just thought you'd want to know that.


Once you've reached the desired color, slowly add chicken broth in, stirring constantly to combine.  Make sure there are no lumps.  Let it cook until it just starts to thicken.  Turn to medium-low heat.


Add both cheeses and all of the seasonings. 


Mix vigorously to melt cheese and make the sauce smooth.


Do you see all the seasoning in there?  Now that is what I'm talking about!  That's the good stuff!


Right about now, the bechamel is smelling divine.  You will be tempted, as I was, to eat it right out of the pan.  I won't say anything if you do.  No judgement here.  But, you already have the pasta cooking, so you might as well finish the dish. 

If you aren't face first in the sauce right now, add the peas and mix well.


Turn to low.  When pasta is done, drain and place in your prepared casserole. 


Stir sauce with peas into pasta.  Mix well to coat all the penne and distribute the sauce evenly. 


Bake uncovered for 20-25 minutes, until heated through.


Do you see all that cheesy goodness clinging to the pasta and nestling inside?  That, my friend, is pure happiness.  Enjoy!

*Note:  If you have ever made a bechamel sauce before, you are going to notice that this is not a true one.  You are absolutely right.  This is a somewhat skinny version.  I replaced the cream or half and half with the chicken broth and let the cheeses make it creamy.  I am not a health nut, but I have realized that, as I get a little older, I have to work a little harder to keep weight off and stay healthy.  With that in mind, I am trying to cook a little smarter by substituting a few little things here and there.  In this case, you really don't miss the heavy cream.  Trust me.

Wednesday, October 24, 2012

Easy-Peasy Tilapia

Have you ever had one of those days where you just can't decide what to make for dinner?  That was me tonight.  To be perfectly honest, it's not like I ever have a plan in advance.  I've tried making up weekly menus but I just can't do it.  I never know what I'm going to be in the mood for until that night.  But, usually, I start thinking of something towards the end of the workday, and I figure it out as I drive home.  Not tonight, though.  I was tired, and nothing sounded good.  I HATE when that happens!

In my head, I was running through what I have in my freezer, fridge and pantry.  The only thing that kept coming to mind was my one, remaining acorn squash.  I knew I wanted to use that, but couldn't decide what to go with it.  About halfway home, I decided on some homemade mac and cheese done my way.  Now what for the main course? 

Finally, when I was 2 miles from my house, I settled on chicken breasts.  I wasn't quite sure how I was going to prepare them, but I thought I would just play it by ear.  Maybe I would come up with a glaze for them.  Yeah, that's what I'll do - a glaze.  Maybe some honey, orange marmalade and sriracha.  That could work.

I pulled into my garage, having decided on Glazed Chicken, Italian Cheese Penne and Peas and Acorn Squash Patties.  After chasing about 5 kittens from my garage (they are the cutest, tubbiest, little things but I don't want them in my garage), I made it into the house and started pulling things from the pantry.  Then, I went to the freezer for the chicken breasts, but what should I see right when I opened the lid?  Tilapia fillets.  Hey, I haven't fixed tilapia in ages!  We actually haven't had fish in a month or two - not since we had a couple of weekends of good fishing, pulling out some nice walleye.  Fish would be good!  Fish would be simple!  Simple is good!  That was all the convincing I needed.  I called an audible, and decided on fish instead of chicken.

I quickly decided that the glaze wouldn't be nearly as good on tilapia as it would chicken, so how should I prepare it?  SIMPLE, my mind screamed!  Remember, we are keeping this simple!  Right. 

That's how tonight's recipe came about.  You can't get much simpler than this, and it's ready in under half an hour.  Perfect!  Here's your Cast of Characters.


4 Tilapia fillets, or any similar white fish like cod
4 Tablespoons mayo
About 1/3 Cup Parmesan cheese
Lawry's, pepper, McCormick Perfect Pinch Garlic and Herb, Mrs. Dash Onion and Herb

Preheat oven to 375.  Line a cookie sheet with foil.  Place fillets in a single layer on sheet.


Place 1 tablespoon mayo on each fillet.


Smear it all around.


Sprinkle with a generous amount of Parmesan cheese.


Season each with Lawry's (go easy on that since the Parmesan cheese has plenty of salt), pepper, garlic & herb and onion & herb.


Bake for 15 minutes, until fish is opaque and the topping is browned.


Plate, and Enjoy!


*Note:  For a different twist, use Kraft Chipotle mayo, shredded colby jack cheese, and a Mexican seasoning blend.  When you serve it, squeeze a little lime juice over the fillets.  This way would be good in fish tacos, as well.  Just pull it apart, and serve in tortilla with spicy slaw.

Tuesday, October 23, 2012

Salted Caramel Pumpkin Cake

By day, I work in a small insurance office, and when I say small, I mean 6 women and the 2 owners.  One of the nice things about working in such a small office is that we are all like extended family to one another.  And, how does a family celebrate a birthday?  With cake, of course!  Or any dessert, really.  We have a nice little tradition here that lets each person know that their birthday is special.  Everyone in the office goes back to the breakroom, at the morning break, to have a dessert prepared by the person who had the last birthday.  We end up staying back there for almost an hour, just talking and laughing and enjoying delicious treats.  I have to say, I am lucky to be surrounded by so many good cooks - the birthday desserts are always fantastic.  But, besides the food, it's the comraderie that stands out.  For that hour, we can forget about the work on our desk, dismiss the stresses for a bit and let the conversations take us wherever they will.  We skip from topic to topic like a jackrabbit on crack sometimes, but it's all good.  We have worked together long enough that it's pretty easy to keep up and follow along. 

My birthday is in September, and the next birthday is in October, today in fact.  The woman I bring for couldn't be easier to please.  Whatever I bring is fine by her, and she is always quick to compliment and say thanks.  When she first started, I found out that she had never had real cheesecake, only the junk that comes out of a box or from Burger King, but she thought those were good.  I was appalled.  No one should have to eat either of those kinds of "cheesecake", let alone think it's good.  I took it upon myself to introduce her to the beauty of a good cheesecake.  That has always been one of my favorite desserts, and I love making them, so it worked out all the way around.  For her first cheesecake, I went with my go-to recipe - Mocha Amaretto Cheesecake.  She loved it so much that for the next 2 or 3 years, I brought her different types of cheesecakes.  Now, I just bring whatever whim strikes me, at that particular moment.  A lot of times, it's related to the Fall season.

That was the case today.  I decided I wanted something pumpkin.  I saw a recipe for Pumpkin Frozen Greek Yogurt, and thought that sounded interesting, but I needed something else to go with it.  Caramel Pumpkin Cake!  That definitely fit the bill.  So, I started culling the internet for recipes.  I finally found one that I liked, but being the crazy nutjob that I am, I couldn't follow the recipe exactly.  Why would I want to do that?  That would go against the very core of my being.  Of course, I made some changes to it.  I'm sure the cake would have been wonderful without my changes.  I mean, it's a pumpkin caramel cake!  What's not to love about that?  How could I make it better?  Add more pumpkin and spices, and make it "Salted" Caramel, that's how!

You may not know this about me, but I have been on 2 major food kicks for quite some time:  anything Buffalo Chicken and anything involving Salted Caramel.  This cake would fit right into my obsession.  Let's get to it!

Here is your Cast of Characters


2 1/2 Cups pumpkin
2 Cups sugar
1/2 Cup oil
4 Eggs
2 Cups flour
2 Teaspoons baking soda
1/2 Teaspoon pumpkin pie spice
2 Teaspoons cinnamon
1/2 Teaspoon nutmeg
1/2 Teaspoon salt
1 Cup caramel ice cream topping
1 1/2 Teaspoons kosher salt
1/2 Can cream cheese frosting
8 Oz. tub of whipped topping, thawed

Preheat oven to 350, and spray a 9 x 13 pan with nonstick cooking spray.

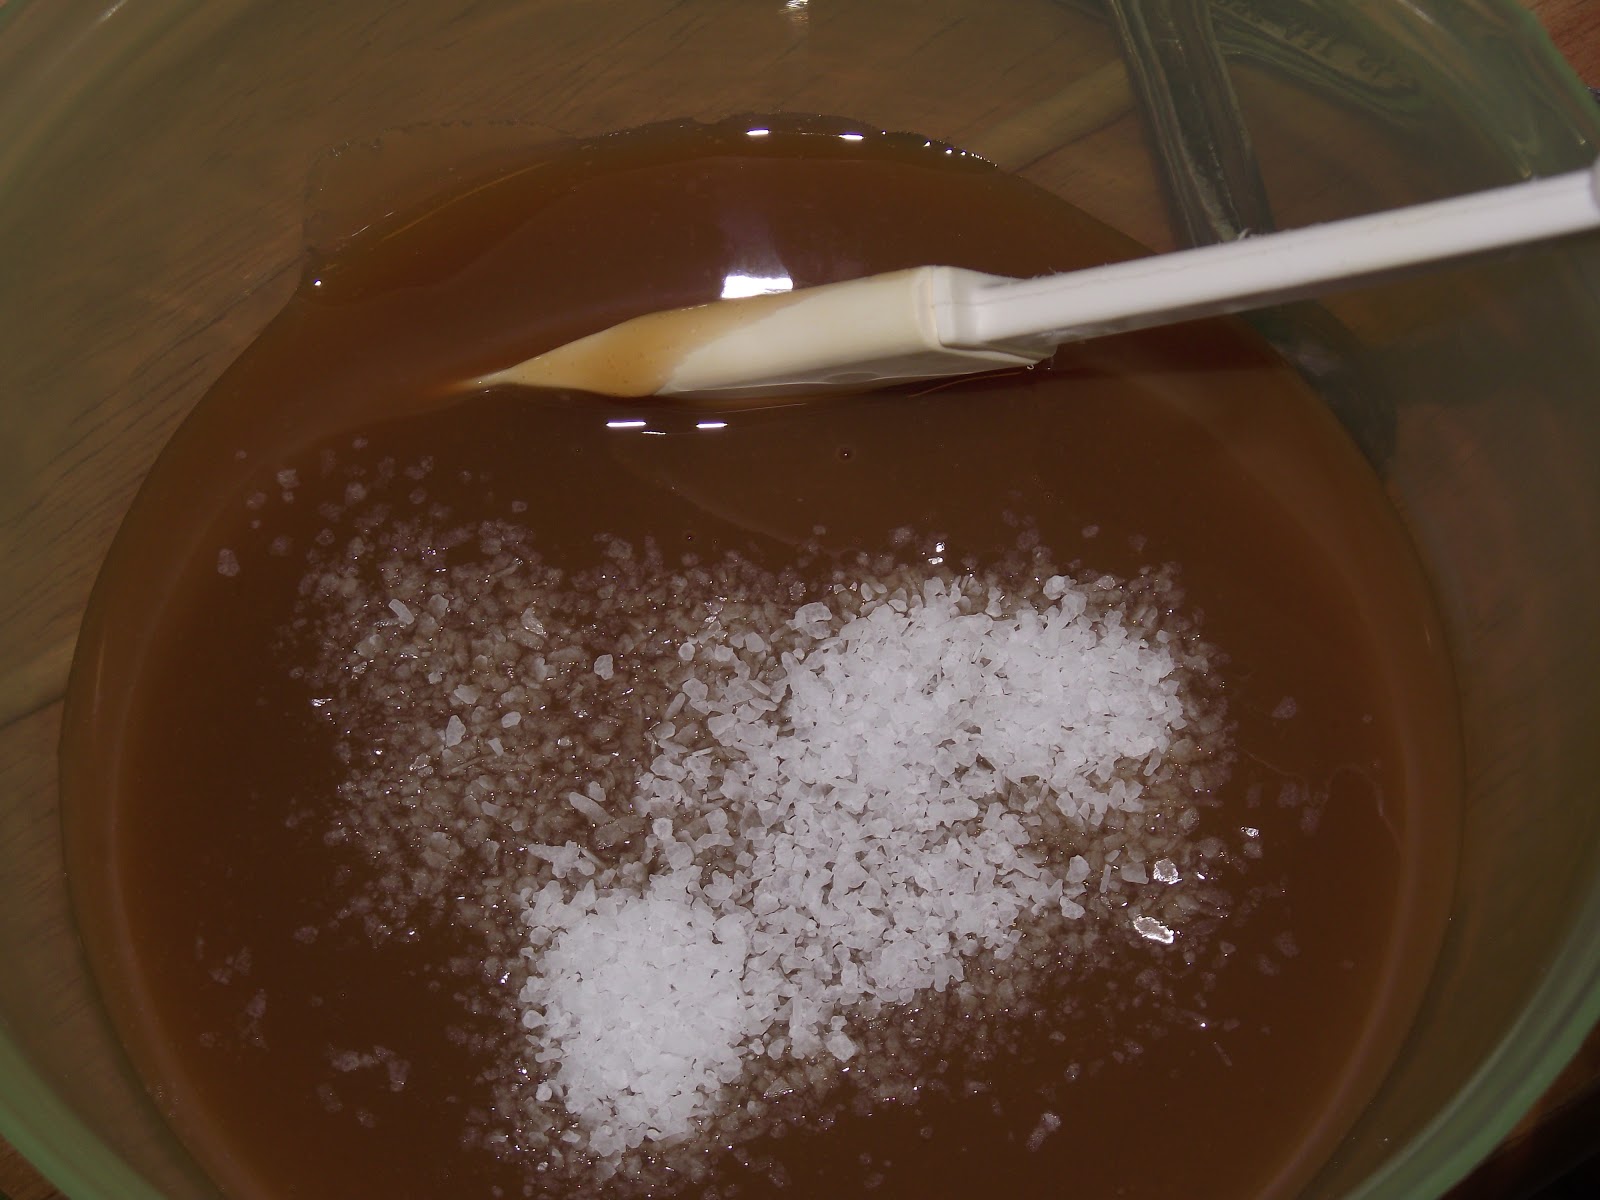
In a small bowl, mix caramel topping and kosher salt.  Set aside until later.


In a large mixing bowl, beat eggs, slightly.


Add pumpkin, sugar and oil.


Mix well.


Add the dry ingredients.


Beat on low until just combined.  Then turn to medium high for 2 minutes.  Make sure to scrape the sides occasionally.


Pour into greased cake pan.


Bake for 30-40 minutes, or until a toothpick in the center comes out clean.

Meanwhile, beat cream cheese frosting until fluffy.


Gently fold in whipped topping.


Stir until well combined.


When cake is done, poke holes in it while it's hot.  A chopstick works well for this - it's the perfect size.


Warm the caramel sauce in the microwave for 30 seconds or until it flows freely.  Pour over the top of the cake.


Use a rubber spatula to spread caramel evenly.


Let the caramel soak in while the cake cools completely.


You can frost the cake with the whipped topping mixture up to 2 hours before serving.


Sprinkle with nutmeg, and refrigerate until ready to eat.


Once plated, drizzle with a little extra caramel sauce, if desired.


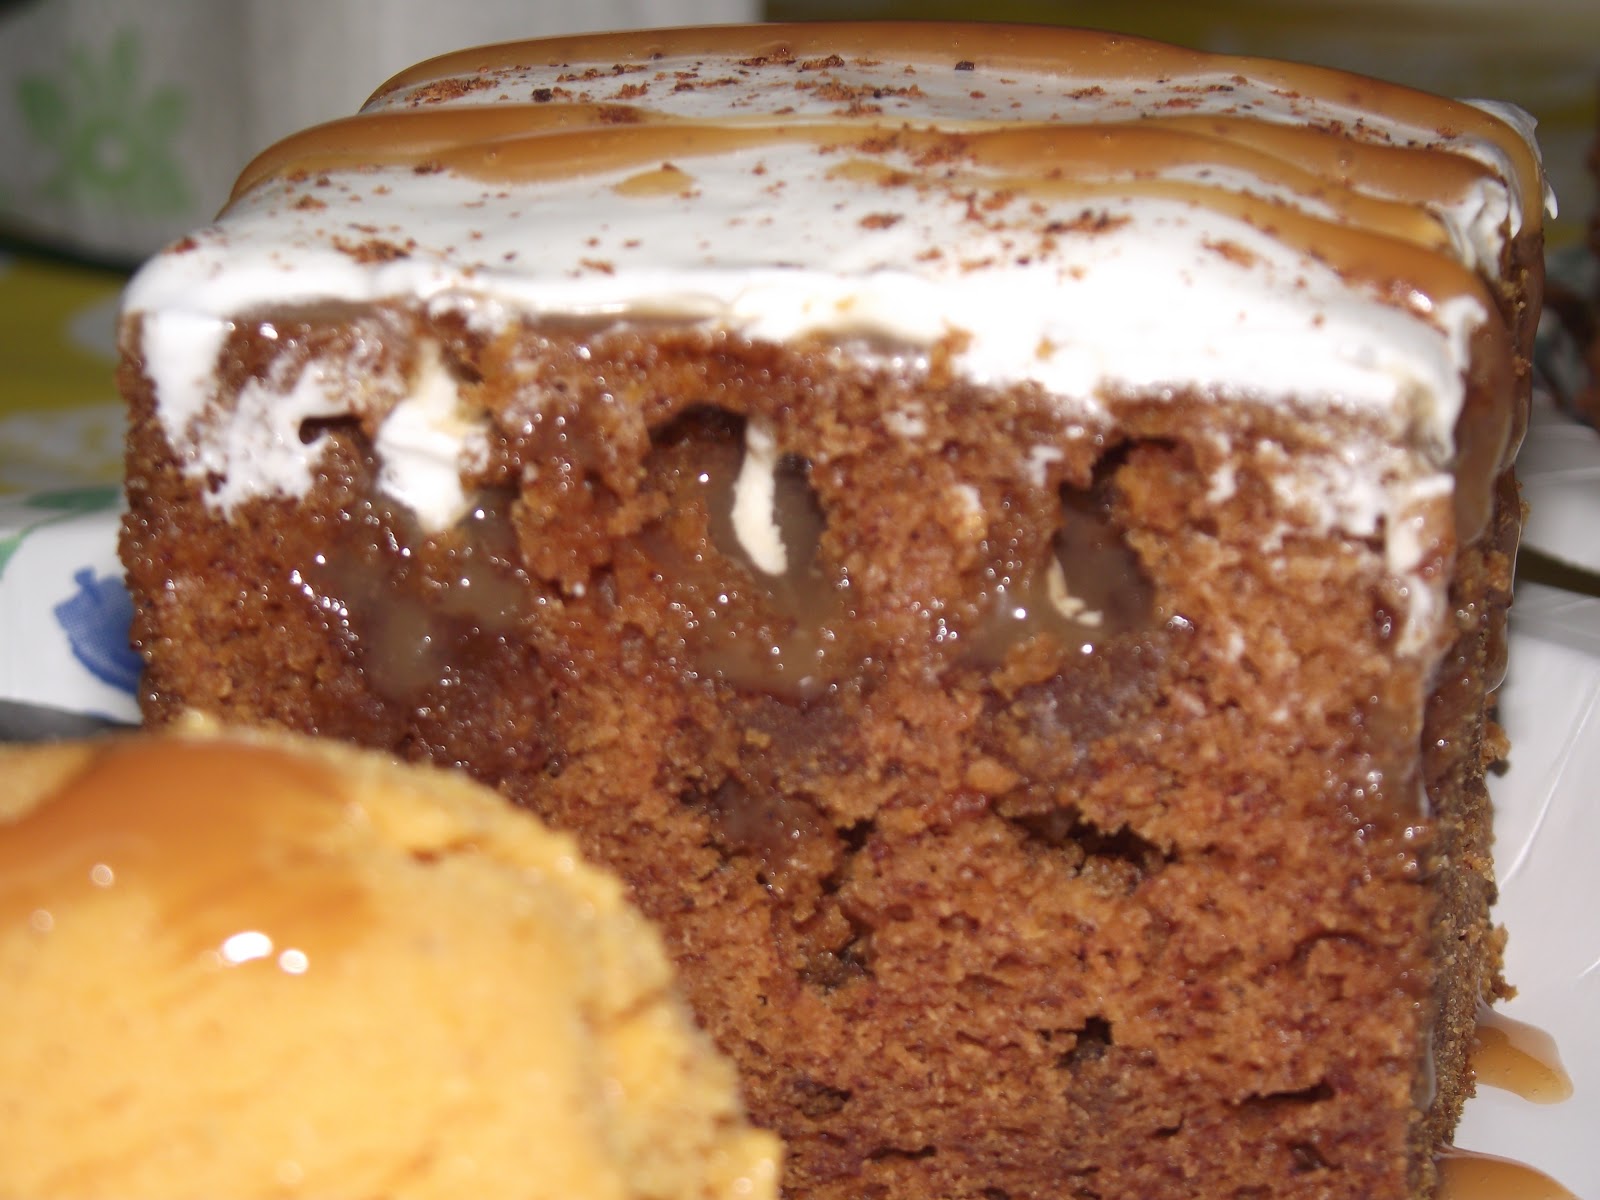
Look at those pockets of gooey, salted caramel!!  POCKETS OF SALTED CARAMEL!!  I've died and gone to Heaven!


Lord help me, I might just eat the whole pan!  Served with Pumpkin Frozen Greek Yogurt.  Enjoy!